Installation Guide
snsagent v0.3.9 is available from npm and the GitHub v0.3.9 release. This guide covers every supported install path, from the one-line npm command to a from-source build.
Recommended install with npm
Requires Node.js 18 or newer.
npm install -g @sns-myagent/cli
snsagent --version
Expected output:
snsagent 0.3.9The npm postinstall script downloads the matching binary for your platform from the latest GitHub release. If the download is unavailable, npm still completes and you can retry with:
npm rebuild @sns-myagent/cliOne-line installer
On Linux, macOS, WSL, and supported Termux environments:
curl -fsSL https://raw.githubusercontent.com/Reihantt6/sns-myagent/main/install.sh | bashThe installer downloads the latest snsagent release asset when one is available, verifies it with snsagent --version, and falls back to a from-source build with Bun when needed. It installs to $INSTALL_DIR (default ~/.local/bin, override with SNS_INSTALL_DIR=/some/path), and prints the PATH command if your shell needs reloading. A GITHUB_TOKEN env var is honored for rate-limited environments.
after the shell installer, reload your shell or run export PATH="$HOME/.local/bin:$PATH" so snsagent is on PATH.
Windows PowerShell
Requires Node.js 18 or newer.
irm https://raw.githubusercontent.com/Reihantt6/sns-myagent/main/install.ps1 | iexThe script installs @sns-myagent/cli with npm and verifies snsagent --version. Pass -UseBun when you already have Bun and want to use the Bun installer path.
Install with Bun
bun add -g @sns-myagent/cli
snsagent --version
For a one-off run without a global install, use the package name:
bunx @sns-myagent/cli --versionRun from source
Requires Bun 1.3.14 or newer and Git.
git clone https://github.com/Reihantt6/sns-myagent.git
cd sns-myagent
bun install
bun run src/cli/entry.ts --version
Build the standalone Linux x64 binary:
bun run build
./bin/snsagent-linux-x64 --version
bun run build produces bin/snsagent-linux-x64 and copies it to bin/snsagent. Generated binaries are release artifacts and are not required for normal source development.
First run
Start the interactive agent:
snsagentUse /setup to configure a provider, or configure a provider in ~/.omp/agent/models.yml. The setup flow accepts a Base URL, API key when required, API type, and model choice.
The first step of the setup wizard collects the provider details (Tab moves between fields, Enter connects):
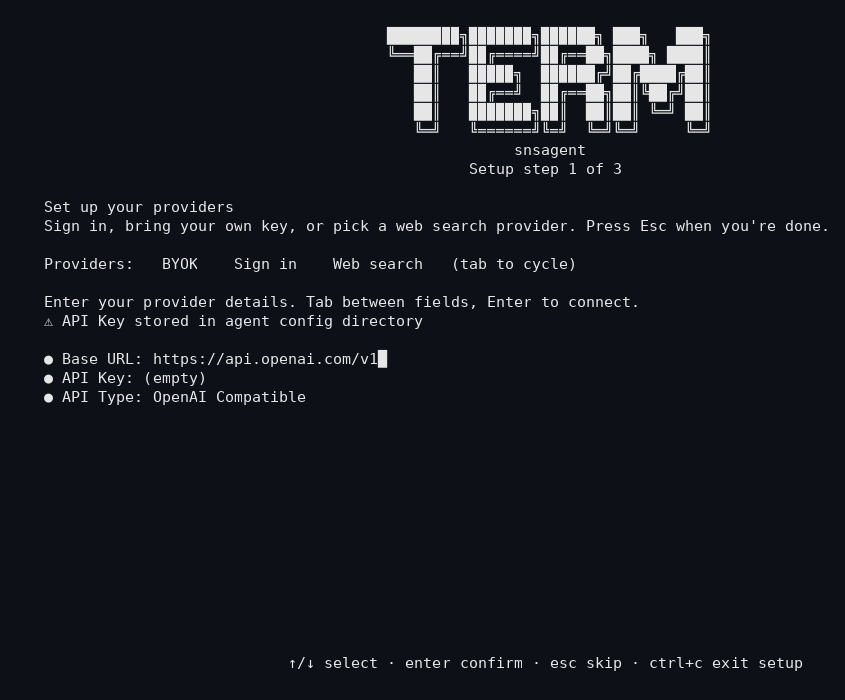
Note: the screenshot uses a fallback font. In a terminal with a Nerd Font installed, the status bar and icons render with their intended glyphs.
Verify an install
snsagent --version
snsagent --help
Uninstall
For npm:
npm uninstall -g @sns-myagent/cliFor Bun:
bun remove -g @sns-myagent/cliRuntime settings and sessions are separate from the package. See configuration.md before removing ~/.omp/agent or .sns-myagent.